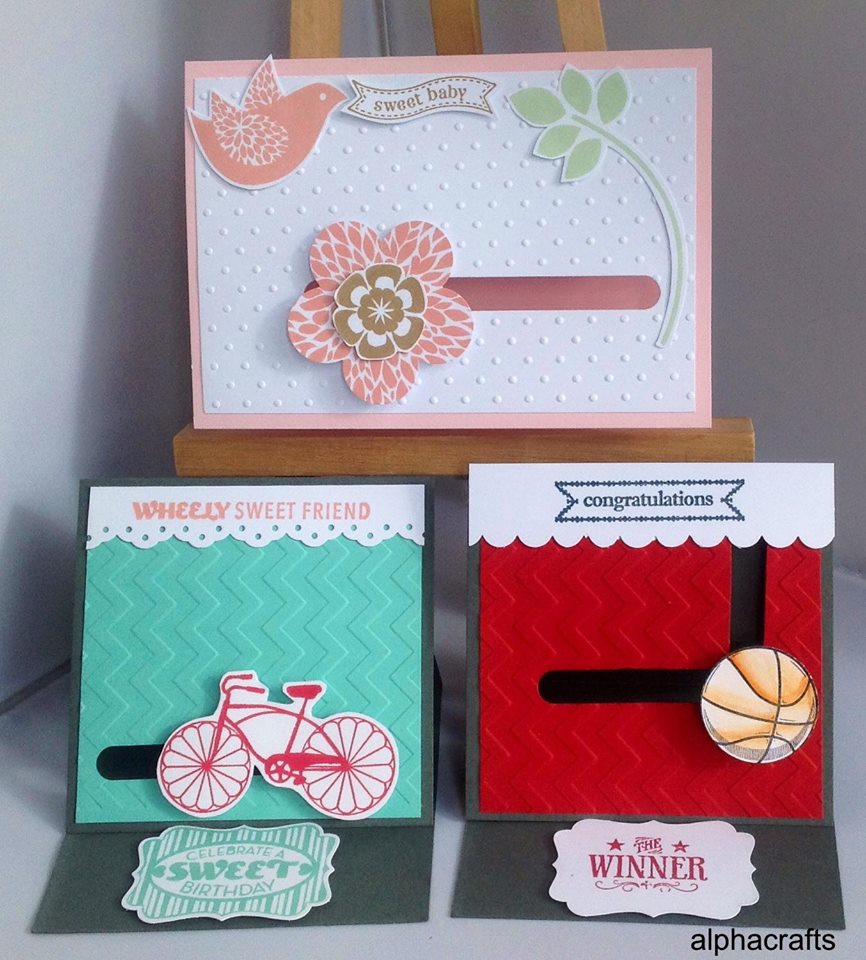
Spinner and Slider cards are fun and interactive. With the help of a window punch and a little engineering, it’s enjoyable to learn this technique.
Here’s how to make the flower spinner card shown in the photo above:
- Add dots to your card front by using the polka dots embossing folder and then attach it to a card base.
- Use the Word Window Punch to create the tracks for the spinner. Punch repeatedly to lengthen the track.
- Stamp a flower and cut out the image using a punch or a die.
- Position the flower along the track and attach a dimensional on the underside of the flower. Make sure the dimensional stays in the hole or else it will not spin along the track. Peel off the backing and attach a button to help the spinner move.
- Embellish with other stamped images and a sentiment for a finishing touch.
Here’s a list of materials used:
- Basic White Card Stock
- Perfect Polka Dots Embossing Folder
- Word Window Punch
- Stampin’ Dimensionals
Another idea for this technique is to create a double track like the one in the photo showing the basketball card. Where else will you use this technique? I think that this will also be a great addition to bullet journals and scrapbook pages.
If you can use something else to replace the button so that it’s not too bulky, the better. Others have used thick cardboard because some buttons are quite thick.
I hope that you enjoyed this card inspiration and that you’ll also give the spinner and slider cards a go.
Check out the online store for current products to help you in your card making.
Also, would you like to learn this technique in class? Let me know so we can organise one for you. Bring along your friends too so you can share the experience.
